Categories
Blog

Managing Business Wi-Fi Passwords

What Your Company Should be Doing to Stay Secure?

Managing Business WIFI Passwords

Most internet users today share a common burden: managing the passwords for various email accounts, online portals, and social media profiles. However, for business owners, managing passwords is a whole different ballgame. They have to keep track of employee account passwords, email passwords, software program passwords and most importantly, company Wi-Fi controls.

Unfortunately, Wi-Fi passwords often get put on the back burner and are assumed to not be very important in the grand scheme of business responsibilities. However, neglecting Wi-Fi password management in the business setting can leave companies open to massive cybersecurity risks that threaten their livelihood and continuity.

Back to Basics: What is a Wi-Fi Network Password?

A common misconception is that wireless network passwords only involve internet access. In reality, much more than web access is at stake when it comes to wireless network passwords. Wireless broadband routers allow administrators to manage their company networks through a specified account. Anyone who knows this account username and password can log in to the router, which gives them complete access to the router’s features and information about connected devices.

Most manufacturers set up all routers with the same default username and password. The username is often something straightforward like “admin” or “administrator.” The password field follows suit using simple defaults like “password” or “public”. However, users are given the option to personalize and change router passwords from the default settings to customize and better secure networks.

What are the Risks? How Weak Wi-Fi Security Leaves Business Networks Exposed to Risk

It’s incredibly important for business owners to change default passwords when setting up a new router. The default passwords and usernames for leading market routers are well known among hackers and cybercriminals. In fact, this info is often posted publicly on the internet for anyone to find.

If default passwords are left untouched, anyone who comes within signal range of a company’s Wi-Fi router can attempt to log in. If they make it inside, they can change passwords and settings, wreak havoc, shut down the router and hijack the entire company network. While there are limits on a Wi-Fi routers signal reach, in many cases it extends outside the office to surrounding buildings and homes at the very least.

Strategic Protection: How to Better Secure Your Company Wi-Fi Network in Uncertain Times

To avoid the risks outlined above, business owners should have clear and explicit Wi-Fi password SOP’s in place. Implementing hardline policies for managing Wi-Fi security is the best way for business owners to keep company networks on lockdown and safe from invasion.

Here are some strategic considerations to keep in mind when developing Wi-Fi security policies:

  • Change default passwords immediately upon install

As mentioned, changing default passwords immediately is critical. To do this, administrators can log into the router’s console with the current password to then set a new, strategic password. Administrators should change the username as well if the router offers this capability.

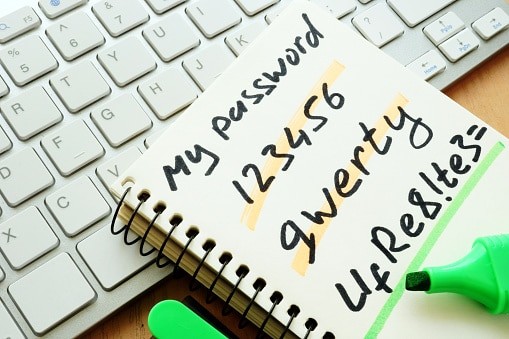
Also, note that changing the default password to a weak one like “123456” or “password1” does not help. Choose a strong and strategic password that hasn’t been recently used and is difficult to guess.

  • Schedule regular password change dates

To maintain network security for the long term, implement a change of the administrative password periodically. In fact, experts recommend changing Wi-Fi passwords every 30 to 90 days.

Planning password changes on a set schedule help make it a standard practice in your office. It’s also a good standard practice for managing passwords in other areas like email and other online accounts.

  • Be Smart with Storage of Passwords and Password Policies

Whatever you do, don’t undermine your efforts to stay secure by storing password policies and login info inconspicuous or easily-accessible places. For this kind of information, it’s probably best to develop and on-paper, hard-copy approach to storage. Storing this information on the company network leaves all of it exposed to potential risk or loss.

Office managers or administrators should have a designated place where a binder of Wi-Fi password information can be kept. The binder should contain password change policies, including dates of previous and upcoming password changes. Additionally, keep a record of recently used passwords as well as a designated section for the current one. This avoids reusing passwords and creates a master log where forgetful employees can look up Wi-Fi security info as needed.

Open Door Policies: Setting up a Secure Guest Wi-Fi Profile to Share Web Access with Customers & Visitors

Another key consideration that business owners need to make in their efforts to manage Wi-Fi security is network use by customers and guests. It’s become second nature for consumers and professionals to assume they can access Wi-Fi while visiting business institutions of all kinds. Providing business visitors and customers with access to the Internet brings many benefits, but if you are going to open your network to guests, security cannot be an afterthought.

Businesses who do not properly manage guest Wi-Fi leave themselves exposed to considerable risk. Visitors on the network could engage in morally or ethically questionable activities on your company network. They may accidentally or deliberately install malware or ransomware, or visit phishing websites. Securing guest Wi-Fi for business visitors will protect visitors and your network, prevent man-in-the-middle attacks, malware downloads and block phishing attacks. Secure guest Wi-Fi also keeps businesses protected from any kind of legal liability.

Here are some tips for creating secure Guest Wi-Fi profiles:

  • Implement Network Segregation

Segregating your network is important for two reasons. First, it ensures that visitors will not be able to gain access to parts of the network used by your employees. Your internal network must be totally separate from the network used by customers and guests. It should not be possible for guests to see your network assets, confidential files, and company resources.

Secondly, in the event of a malware infection due to guest web access, network segregation ensures the attack will not spread from the guest network to your internal network. Businesses should implement a network firewall or create a separate VLAN for guest use and use a software firewall to protect servers and workstations from guest network traffic.

  • Always Change Defaults

We’ve said it once and we’ll say it again. Changing default passwords and usernames is one of the most basic security practices. However, it’s often the one that’s most commonly forgotten. There are countless reports of data breaches that have occurred because of the failure to change default passwords.

It is also a good idea to change your SSID for your Wi-Fi network. The SSID should reflect the name of your business and it should be quite clear to your customers which is network is yours. Failure to do this makes it easier than ever for hackers and criminals to set up rogue access points and launch man-in-the-middle attacks.

  • Stay on Top of Firmware Updates

Like all tech updates, firmware updates are issued for a reason. They patch vulnerabilities that are easily exploited by cybercriminals to gain access to business networks and devices.

If these vulnerabilities are exploited, your business network can be hijacked by malicious individuals. Businesses should have policies in place that require firmware updates to be installed regularly and promptly, with checks performed monthly.

  • Encrypt Company Wi-Fi Network Signals

You want to make it as easy as possible for your guest Wi-Fi network to be accessed by your customers and visitors. However, be sure you don’t make it too easy for hackers to spy on individuals connected to your company network.

Encrypt your wireless network with WPA2 encryption. You can then post the SSID and password strategically to make it as easy as possible for legitimate guest users to access the network.

  • Filter Content

Managing and securing guest Wi-Fi also involves implementing and managing controls over the content that can be accessed on your Wi-Fi network. Content filtering is a must for any business offering guest Wi-Fi capabilities. Access to any kind of adult content should be blocked, including: pornography, gambling sites and other web content that is ethically or morally questionable.

Content filtering solutions will also protect your customers from accidental malware and ransomware downloads while blocking phishing websites. Consider using a cloud-based web content filter as they require no additional hardware purchases and allow for remote monitoring.

Increased internet access is without a doubt making life easier for businesses and consumers alike. Access to the information highway is great, but businesses especially need to be aware of the threats posed by anytime, anywhere Wi-Fi access. Keeping business networks dynamically secure with strategic passwords should be at the top of the priority list for any modern business.

Protecting your company’s continuity means protecting your company network. Phoenix Technologies has helped countless businesses implement security strategies that keep Wi-Fi networks dynamic and secure.

Categories
Blog

Setting Up and Managing Contacts in Microsoft Outlook

There’s no denying that email contacts are the modern-day equivalent of the traditional address book. For modern businesses, digital contacts are a company’s lifeline. They provide the means of connecting with clients, collaborating with team members and communicating important information to employees. Without an organized approach to setting up and maintaining these digital address books, communication lines can be broken and business productivity can take a hit.

Microsoft Outlook Contacts

A huge number of modern professionals use Microsoft Outlook to send and receive business mail. Whether businesses are using server versions like Exchange or cloud-hosted versions with an Office 365 subscription, developing streamlined procedures for setting up and managing Outlook contacts will save your business time and hassle.

Today’s Rolodex: Using Outlook Contact Lists to Streamline Business Communication  

The contact list feature in Outlook has a variety of streamlining tools to make business communication easier than ever. For instance, with an organized contact list, new emails can be addressed simply by typing the person’s name or selecting it from your contact list. Additionally, if you’re detailed when building your contact list, you can add other personal info like mailing addresses and phone numbers. This allows businesses to use Outlook as their easy-to-manage and scalable ‘digital Rolodex’.

The process of building a contact list will vary among different businesses, depending on their situation. Some companies will be starting from scratch, creating an entirely new collection of contacts, while others will already have some contacts in place. Regardless, keeping an organized list of contacts is the best way to keep track of all the people you communicate with.

Building Your Contact List: Creating, Syncing and Adding New Contacts in Outlook

There are a few different ways to add contacts to your Outlook list. You can manually create a contact with all the necessary details. You can avoid manually adding contacts by syncing a pre-existing list from another webmail provider. You can select someone’s email address to manually add that person as a contact. Or you can use the Outlook Suggested Contacts tab to select familiar contacts to add. Let’s check out the details for each way of setting up contacts in Outlook.

Manually Creating a New Contact

  • Open Outlook.
  • Select the People icon in the lower half of the left side pane.
  • Select the New Contact
  • In the Contact window, enter all relevant contact details for this person.
  • Select Save & Close.

Syncing an Existing Contact List from Another Source

Export your existing list:

  • Pull up your online mail service using your internet browser.
  • Select the contacts you want to export and click on the appropriate export command.
  • Choose the option of exporting your contacts in Microsoft Outlook or Outlook CSV
  • Save the exported CSV file.

Import your contacts into Outlook:

  • Open Outlook.
  • Select File and then select Open & Export.
  • Click the Import/Export
  • In the Import and Export Wizard, select the option to “Import from another program or file” if it is not already selected.
  • Click Next.
  • At the Import a File window, select the Comma Separated Values option if it is not already selected.
  • Click Next.
  • At the next window, browse for and select the CSV file you exported from your webmail browser.
  • The next window will then provide three options:
    • Replace duplicates with items imported,
    • Allow duplicates to be created, or
    • Do not import duplicate items.
  • Select the option you want and click Next.
  • At the next window, make sure Contacts is selected as the destination folder.
  • At the final window, confirm that the CSV file will be imported from the Contacts
  • Click Finish.

As a side note: Export settings will vary among different webmail providers. For instance, with Gmail, you can select the contacts you wish to export, export a specific group, or export all contacts. However, with Yahoo, your only choice is to export all your entire contact list.

  • Creating a New Contact Using Email Address Selection
  • Right-click on an email address in a received or sent the email message.
  • From the popup menu, select the Add to Outlook
  • A contact card will pop up – enter any further contact details required.
  • Click Save to add that contact to your master list.
  • Using the Suggested Contacts Feature
  • Open the Contacts
  • Select Suggested Contacts in the left side pane.
  • Select the contacts you want to add to your Contact list.
  • Drag and drop your selections into your Contact list.

Managing Contacts in Outlook: Making the Most of Your Outlook Contact List

Once you have your Outlook Contact List started, it’s just as important to keep it organized. Making sure you weed out old contacts, verify that information is correct and up-to-date, and manage contact access will ensure that your entire staff experiences the streamlining power that Outlook offers.

Editing & Deleting Contacts:

There’s nothing worse than having a crowded contact list, filled with outdated or unnecessary contacts. Maybe you have old employee info to remove or maybe there’s a stash of an old client’s info that’s no longer relevant. Regardless keeping your contact list groomed is a great habit to keep.

Here’s the step-by-step process for editing or deleting contact info:

  • To view the details for any contact, double-click on the contact name or right-click on the name and select Edit Contact from the menu.
  • If you need to edit info, make the necessary revisions and when finished, click
  • If you want to delete a contact completely, just select the contact and use the Delete key on your keyboard. Otherwise, you can right-click the contact and manually select Delete from the menu.

Dual Contact View

This might seem like a strange feature, but viewing two contacts at the same time can be extremely helpful in organizing your inbox. Perhaps you have duplicate entries for a certain contact and you want to compare info to see which is most recent. Or, maybe you communicate with multiple people in the same office and want to make sure addresses and phone numbers match.

Regardless of the reason, here’s how to pull up two contacts at once in Outlook:

  • Double-click on the first contact you’d like to view.
  • Select the Cancel button to display the contact card.
  • In the card, click on the Pin icon to keep the card visible.
  • Double-click on the second contact and perform the same steps to keep the second contact in view.
  • Now you’re able to position the two contacts in a side-by-side view.
  • Click on the Edit link for each contact card.
  • Copy and paste information as needed, from one contact to the other.
  • When done, click Save for the contact whose information you revised and Cancel for the other.
  • Then, close each of the two contact cards.

Add Individual Contact Lists to the Outlook Address Book

To keep businesses even more organized and productive, the Outlook Address Book helps to centralize company contacts in one place for easy access. Using the Outlook Address Book allows you to access your contacts instantly from within an email message by selecting the To, Cc, or Bcc buttons.

Here’s a step-by-step process for adding your contact list to the Outlook Address Book:

  • Open Outlook.
  • Select the File
  • Select the Account Settings button, then select Account Settings again.
  • In the Account Settings window, select the Address Book
  • Make sure an address book is listed. If not, select the New
  • Select the option for Additional Address Books and click
  • Click Finish.
  • In the Contacts window, right-click on your Contacts list.
  • Select Properties from the popup menu.
  • In the Contacts Properties window, click on the tab for Outlook Address Book.
  • Click on the checkmark to “Show this folder as an Email Address Book” if it is not already checked.
  • Click

Here’s how to access and view contacts once they’re added to the Outlook Address Book:

  • Go to your email view and start a new message.
  • Click on the To field, and you should see your contacts listed.
  • Double-click on the contact or contacts that you want to send mail to.
  • Click any contact that you want to Cc and then select the Cc
  • Click any contact that you want to Bcc and then select the Bcc
  • Hit send and you’re all set!

As you can see, while business contacts are a straightforward concept, Outlook offers a variety of dynamic ways to create, maintain and optimize your digital address books. Staying on top of organizing and updating business contacts is critical to ensuring your company’s line of communication is working as strong as possible. Make sure your company is making the most out of the technology you deploy.

It should be noted that these step by step instructions are for the 2013 and 2016 versions of Outlook. However, the steps for earlier versions are quite similar. If you’ve recently made the switch to Outlook or if you’re looking to get on top of your Outlook Address Book once and for all, don’t feel overwhelmed. Making use of Outlook’s dynamic contact management features will have your digital address book neat and tidy in no time.

Skip to content