Categories
Blog

How to Automate Microsoft Outlook Email Responses

Automate Email Replies in Four Ways to Share Information Better

Learn how to use four powerful tools to automate Microsoft Outlook email responses, including Automatic Replies, Quick Parts, Signatures and Templates  

Managing email responses, especially if you are a busy executive looking to keep in touch with clients, colleagues, investors and partners.

With Microsoft Outlook, you have multiple opportunities to automate your email responses. Here’s a look at four of the most effective ways to automate your email responses.

How Can I Use Templates to Automate Email Responses?

Templates are a simple way to create automated messages.

You can start with templates by creating a new message or replying to one.

On the ribbon, click on the View Templates button. This will bring up a new window with a section called My Templates, with a few common responses listed.

You can edit or remove these templates or create your own. For each template, you can give it a title and in the text box enter in any standardized response you choose, including copying and pasting from other documents.

Once you have your templates selected, you can add them to a new email or response quickly and edit them within the body of the message. For frequent phrasing and responses, the templates option helps to accelerate your communication.

The advantage of templates is that they are very easy to use, edit, update and delete. The downside is that they are very basic and include no formatting options within the template itself.

How Can Signatures Be Automated?

Preset signatures can help create various messages for different situations. In most cases, a default signature will be applied to all your outgoing messages. These signatures typically contain the following:

  • Full name
  • Title
  • Phone numbers
  • Website
  • Social media links

Often these signatures are standardized throughout an organization or division, and often contain specific marketing or legal language.

Signatures are highly formattable and can contain graphics or photos to convey further messages.

You can use signatures to be more productive and create messaging that varies based on the email recipient or whether the email is for business or personal reasons.

To create, modify or delete signatures, there are several ways to proceed. If you’re in a new message, go to the Message tab and click on the Signature button. This will bring up any existing signatures already in your account. To create a new one, click on the Signatures … selection at the bottom of the menu.

Another way to access the Signatures functionality is to use the File menu, clicking on Options, then Mail then Signatures.

No matter which option you choose, you’ll reach a new screen where you can select an existing signature to edit, rename or delete, or create a new signature. In the bottom box, you can:

  • Add text and images
  • Adjust the font and size
  • Insert hyperlinks
  • Set the signature’s alignment

Signatures are listed alphabetically, so naming conventions are important, especially for employees managing emails for other people or corporate accounts.

The top right section of the Signatures screen allows you to choose the email account to use and the default signature to use for new messages and replies or forwards.

Signatures have additional functionality. For messages that are sent repeatedly, the Signatures tool helps automate communication. The signature box can be used to include copy that is used for regular messages — a much faster option than saving text to a draft message or copying and pasting from a Word document. You can create multiple response signatures for typical inquiries.

What Are Quick Parts?

Quick Parts, formerly known as Building Blocks and Auto Text, helps you copy and save repeated boilerplate text blocks that can be inserted into an email. This is helpful for messages that include requests for information or other repetitive content.

To create a new Quick Part, reply to a message or create a new one. Type new text or highlight and copy existing text that you want to retain. Formatting will remain. In the ribbon, under the Text group, click on the Quick Parts button. This action brings up a list of existing Quick Parts, sorted by category, and allows you to create a new entry. A new window appears, where you can create a name, gallery category and description for the entry. (You can create new categories from this screen, too.)

Finally, you can determine in what email template you want the Quick Part available and some options for insertion.

Once saved, the Quick Part is now available for use. Create a new message, click on the Insert button and then the Quick Parts option to see a list of options for you to insert.

Quick Parts has several advantages. It allows for the inclusion of long entries with retained formatting for text and graphics. It also allows you to add multiple Quick Parts to the same message.

Right-clicking on any of the Quick Parts pops open options for where to insert the quick part, edit its properties or organize your available items. Quick Parts can also be inserted into Calendar entries or Tasks.

How Do Automatic Replies Work?

Automatic Replies are a standard staple in most offices. It’s an excellent time-management tool that quickly lets those within and outside your organization know your status.

To use Automatic Replies, you’ll need to be using an Outlook version that includes Microsoft Exchange server account or Exchange Online through Office 365. Standalone versions of Outlook do not support this feature.

Access Automatic Replies by going to the File tab and choosing Automatic Replies (Out of Office) from the Info tab. Select the Send automatic replies button and if you prefer, enter the dates and times you want the feature to be used in response to incoming messages.

The window defaults to the message you want sent inside your organization. You can add the text you need and apply basic formatting (font, size, effect, bullets or numeration, and indentation.

Remember to review the content so you don’t use an old message.

You can also opt to have a different message for those outside the organization. You can cut and paste between the two audience windows to create customized communications options.

The basic information to include in an Automatic Reply message is:

  • The length of your absence
  • When you will return
  • Who to contact for urgent matters

The Automatic Reply message is also a great way to share other information, such as social media links, news or other high-value content.

You can also set rules regarding your messages, such as whether to alert or copy a coworker regarding messages from specific senders or to reply with a specific template.

Once turned on, you’ll see a message bar in yellow at the top of your Inbox reminding you that Automatic Replies are turned on, along with an option for turning them off.

Automation is a powerful way to save time, deliver important messages and improve communication in your email responses. Using the four featured solutions here, either independently or together, can keep projects moving and share information.

Microsoft Outlook Training

Categories
Blog

Secrets to Searching Tabs on Chrome (It’s Time to Get Organized!)

Save Time and Headaches by Searching Your Open Tabs Instantly

It is easy to lose track of which open tab contains the information you need when you are researching.

Use this Chrome tool to instantly find the right tab.  

Searching Browser Tabs

Do you do a lot of research online for work or school? Then you know that It isn’t uncommon to have 6, 7, or even more tabs open on your internet browser at the same when you are working on a large project. But with that many tabs open, you can easily forget which tab contains the information now. But don’t worry, Google Chrome has your back.

With Google Chrome, you will never again have to feel frustrated or waste your time clicking randomly on multiple tabs trying to find the one you want. You can just use the URL box, or what Google Chrome calls it’s Omnibox, to search your open tabs for the one you need. You may already be aware of some of the most useful tasks you can access directly from Chrome’s Omnibox such as solving mathematical calculations, checking the local weather or even finding files on your Google Drive, but did you know you can use it to search through your open tabs?

How to Use the Omnibox to Search Open Tabs

  1. Enable the Omnibox search mode. The ability to search your open tabs is disabled by default. Before you can use it, you will need to enable the capability. You can do this by opening a new tab in your Chrome browser. Then in the Omnibox at the top of the page, type or paste Chrome://flags/#omnibox-tab-switch-suggestions. Hit enter on your keyboard. This will take you to a long list of options with Omnibox tab switch suggestions highlighted in yellowSelect Enabled from the dropdown menu just to the right.
  2. Restart your browser. You will need to restart your browser to complete the process. If you are in the middle of a project, you may want to use the Relaunch Now button to remember your open tabs after restarting. Otherwise, close and restart your browser in the normal way.
  3. Conduct your first search. After Chrome restarts, and you have at least two tabs open, it is time for a quick test. Enter text from the title of any of your open tabs into the Omnibox. As you type, you will see several suggestions popup under the Omnibox. If you want to jump to one of the open tabs, click on the Switch to this tab button next to the suggestion. This will open the tab immediately in the browser.

Everyone is looking for ways to streamline their workflow. This small tip will definitely save you a few seconds several times throughout your day, and significantly add to your productivity.

Categories
Blog

How To Download Audio From Facebook Messenger

Young Business Person Downloading Facebook Messenger Audio

How To Download Audio From Facebook Messenger

Facebook Messenger is one of the most popular chat and messaging services in the world. Increasingly, Facebook Messenger is increasingly being used to communicate using text, audio, and video.

However, a common question asked by users of Facebook Messenger is how audio files can be saved from within the messages app.

As it currently stands, the ability to save audio messages is not an integrated feature built into Facebook Messenger itself. Fortunately, there are a few reasonably easy ways to save audio messages to your desktop or laptop.

Method one: Open Web Inspector in your browser

The first method may seem a bit tricky, but it’s actually pretty easy once you get the hang of it.

First, find the audio message that you want to save within Messenger. Next, select “Develop” then “Show Web Inspector”. After that, you’ll want to select the “Network” tab and look for a file that starts with “audioclip-” followed by letters and numbers, and ending in “.aac”. Right-click or double-click on the file and it will download to your Download folder.

Once you’ve done that, the audio file will be saved to your computer, and can be shared or moved like any other file.

Method two: Mobile site hack

An alternate method involves using the mobile version of Facebook on your desktop computer. To do this, simply type “m.facebook.com” instead of facebook.com” as the URL. Once there, click on messages and find the audio file you want to save. Once you find it, click the down-facing arrow in next to the audio clip. As in Method one, you should see the file download to the Download folder on your desktop.

Hopefully, Facebook will eventually integrate the ability to save audio files in a streamlined and user-friendly way. For now, rest assured that the two methods described above will allow you to save audio files quickly and easily.

Categories
Blog

How Can You Encrypt Files and Folders in Windows 10, 8 or 7?

Data Encryption

How Can You Encrypt Files and Folders in Windows 10, 8 or 7?

You can encrypt files and folders in Windows (vers. 7-10) using BitLocker. This Vista operating system extension has on-disk encryption as well as key management capability. It’s protected by two-factor authentication, so anyone who wants to crack the code needs a hardware key and your specified long passphrase.

Through its trusted platform module (TPM) hardware, BitLocker provides advanced security features. For instance, when encryption is only at the software level, access may be vulnerable to dictionary attacks. Hardware-level protection safeguards your system from guessing or automated attacks.

What Steps Let You Check For a TPM Chip?

Follow these steps to see if your computer has a TPM chip:

  1. Select the Windows key + X and choose Device Manager.
  2. Expand on Security devices.
  3. One of the devices should read Trusted Platform Module and contain a version number.

BitLocker is typically available on these platforms:

  • Windows 10 on Enterprise, Pro, and Education
  • Windows Vista and Windows 7 on Ultimate and Enterprise
  • Windows 8 and 8.1 on Enterprise and Pro
  • Windows Server 2008 and later

How Can You Encrypt Files and Folders in Windows 10, 8, or 7?

Follow this procedure to encrypt folders and files:

  1. In Windows Explorer, right-click on a folder or file.
  2. From the context-menu, choose Properties.
  3. In the dialogue box, click Advanced.
  4. The Advanced Attributes dialogue box appears. Look for the Compress or Encrypt Attributes section.
  5. Check Encrypt contents to secure data.
  6. Click OK then Apply.
  7. For folders, a Confirm Attribute Change dialogue box appears to confirm whether you want everything in the folder encrypted. Select your preference and click OK.
  8. You can also choose to Back up your file encryption key. If you miss the message, you can access it in Notification Area for your operating system.
  9. Make sure to plug in a USB flash drive.
  10. Choose Back up now (recommended).
  11. Click Next to create your certificate.
  12. You can accept the default file format for the export.
  13. on the next screen, select the Password: box to enter and re-enter your password.
  14. Go to the USB drive, enter a name for the key and certificate you’re exporting and click Save. (It’s saved with as a .pfx)
  15. Click Next, Finish, and OK.
  16. Remove the USB drive and store it in a secure spot.

How Can You Decrypt a Folder or File?

To decrypt your file or folder:

Follow steps 1-6 above. However, uncheck the Encrypt contents to secure data box for step 4.

Now, you can unlock your drive at startup by entering a password or inserting the USB drive.

You can encrypt the whole hard drive, but the process is time-consuming. If you have a lot of data, expect to wait a long time. You’ll want to leave your computer connected to an uninterrupted power source throughout the process. You have to reboot for the changes to take place. However, you can work throughout the process.

Now you can secure your files to keep out prying eyes and hackers.

Categories
Blog

How to Password Protect an App on Your Android Device

Password Protect Android Device

Have you ever wanted to put access to certain apps on your phone or tablet under an extra layer of security? There are all sorts of reasons people might want this. Maybe you want to share your phone with a child, but you don’t want little Johnny messing with work apps or your grown-up Netflix account. As another example, maybe you want to let a fellow salesperson review a presentation on your phone without having access to your contacts and sales leads. Some people may have sensitive chats that they want to keep safe from inquisitive eyes, too.

Whatever your reason for wanting to protect certain specific apps, we have good news and bad. First, the good: On Android, there’s an app (or 3) for that! The bad news: there really isn’t any kind of equivalent function on Apple beyond the content restrictions found in Screen Time. If this is something you want to do, you’ll need an Android Device.

How to Password Protect Individual Apps on Android Devices

Password protecting individual apps isn’t something that you can do natively on Android phones. In other words, the functionality is not a standard feature that’s part of the operating system. That said, there is a way to add this functionality. You just need to download the right app.

Step 1: Download AppLock by SuperTools

The first step is to download an effective app-locking app from the Google Play store. There are several to choose from. We recommend AppLock – fingerprint lock & phone cleaner, by SuperTools.

Remember that the Google Play store has plenty of lookalike and copycat apps. If you search for an app protector app, make sure you select this one or another that has very strong reviews.

Install the app, then click OPEN once it’s installed.

Step 2: Set an AppLock Passcode

Once you open AppLock, you’ll be greeted with a landing screen with a big START button. Tap it. The next screen prompts you to create a new password. Don’t be fooled if this screen looks like your Android login screen! It’s something different entirely. This is where you create the password you want to use to access your password-locked apps.

Pick something you can remember but that’s different from your phone’s main lock code. Otherwise, you’re more or less defeating the purpose of this added security. If your kid or your coworker knows your main password, he or she can just guess that same password when trying to access a sensitive app and bingo, they’re in.

When you finish setting up your passcode, you’ll get a couple screens asking if you want to give AppLocker permission to draw over other apps. Set this to Allow/enable/permit, whatever your version of Android calls it. You may need to do this in 2 consecutive screens.

Step 3: More Configuration

Once you’ve taken care of your permissions settings, head back over to the AppLocker app. You should see a list of other apps. Find the ones that you want to lock and click the icon on the right that looks like an open padlock. It will change to a colored, closed padlock when you tap it.

Once you’ve selected all the apps that you intend to lock, click the LOCK button at the bottom.

Step 4: Test It Out

Now that you’ve configured your AppLocker app, it’s time to test it out. Exit to your main screen and open an app that you’ve locked. You should see a secondary login screen with the app’s icon at the top. Enter the passcode you created earlier, and you’re good to go.

Wrap-Up

Adding an app locker to your Android device is a simple way to add an extra layer of security. You’ll gain the freedom to share your device with more people knowing that your sensitive apps are protected.

Categories
Blog

How To Remove Microsoft Office Metadata?

Microsoft Office Metadata

This article covers the definition of metadata and how to view, manage and delete it in Microsoft applications.

What is Metadata?

Metadata is information about your data. It contains facts that can’t be disputed, the same way data does.

Here is an example from Microsoft Word. Let’s say you’re writing a letter to a co-worker. The letter consists of characters that form words and sentences. To the computer, this is translated as a series of ones and zeroes that make up the data associated with your letter. Other information about the letter includes when it was typed, who wrote it, when it was saved, and what version of Word you used. These facts are metadata.

How Can You View Office Metadata in the File?

You can view the metadata associated with your Excel, Word and PowerPoint files. (Metadata for Outlook email is more complicated and isn’t covered here.)

  1. Open the workbook, document or presentation you wish to check.
  2. Click on the File menu in the top-left of the screen.
  3. On the Info screen, you’ll see the Pages, Size, Total Editing Time, Words, Created, Last Modified, and Related People options.
  4. At the bottom of the list, click Show All Properties for more information.

NOTE: Look at the Template data. Keep in mind that a template with your name or company name can be used to trace the file back to you.

How Can You View Office Metadata in Windows Explorer?

You don’t have to open the file to view the metadata. Here’s how to view it in Windows Explorer:

  1. Open Windows Explorer and go to your saved file.
  2. Right-click on for filename or icon and click Properties.
  3. Click on the Details tab of the Properties window. The metadata appears in a list.

What’s the Best Way to View Metadata for All Your Microsoft Files?

You can use Extensible Markup Language (XML) to view the metadata for all your presentations, documents and workbooks. XML is used to store metadata in computing, including Microsoft Office files.

Let’s use a Word document as an example of how to use XML to view metadata:

  1. In Windows Explorer, go to your saved file.
  2. Make a copy to protect the original file.
  3. Select the copied and either click the F2 button or right-click to select Rename.
  4. Change the file extension to .zip. (NOTE: Each Office filetype ending in x contains compressed XML documents.) Click Yes on the warning that appears.
  5. Right-click the file to choose Extract All…
  6. You will be asked where to save the extracted files and whether to show them when finished. Leave the default values and click Extract.
  7. The extraction produces three folders as well as an XML file. You can examine the files to view the stored information. When you double-click an XML file, it usually opens in Internet Explorer.
  8. You should be able to piece together what the information means. These XML files may include your name: core.xml under the docProps folder, and document.xml and people.xml in the word folder.

How Can You Delete Metadata from Microsoft Files?

Here are the steps to follow to delete your information from these files in Excel, Word or PowerPoint:

  1. Click on the File menu in the top-left corner.
  2. On the Info page, select Check for Issues near the middle of the page.
  3. Select Inspect Document and the Document Inspector opens.
  4. Ensure that all the Document Inspector checkboxes are checked, then select the Inspect button.
  5. Once the Document Inspector finishes, you can see the information it found. If you see a green checkmark in a circle, it found no data for that category. A red exclamation mark indicates it found data of that type.
  6. There’s a Remove All button next to the data type’s description. Click it to remove all data of a certain type. Scroll down to ensure you clear all the desired data.
  7. To double-check, click the Reinspect button to see if you missed anything.
  8. Save your document so that the data isn’t re-entered.

What are the Steps to Ensure the Metadata was Deleted?

First, repeat the steps under “How Can You View Office Metadata in the File?” When you inspect the document.xml, people.xml and core.xml files, there shouldn’t be any personal data. Change the extension from .zip to .docx, to open the file in Word.

How Can You Delete Metadata using Windows Explorer?

This method strips metadata from several files at the same time.

  1. Open Windows Explorer and go to the file with the metadata you want to take out. Right-click it to select Properties.
  2. Under Properties, click the Details tab then select both Remove Properties and Personal Information.
  3. There are two ways to remove information. Remove the metadata from the original file or a copy.

How Do I Remove Metadata from Original File?

  1. Select Remove the following properties from this file:
  2. Check the boxes you want to remove or choose Select All button.
  3. Click OK.

Can You Make a Copy with No Metadata?

This makes a copy of your file with the “Copy” appended to the filename. This copy will have no associated metadata.

  1. Under the Remove Properties window, click Create a copy with all possible properties removed
  2. Click OK.
  3. Compare the properties of the original and copy to view the changes.

Are You in the Clear Now?

What you do next with the document determines whether your metadata stays gone. Digital processing, such as emailing it, may add metadata. The best option is to print and mail the document to avoid add metadata that could be traced back to you.

Categories
Blog

How to Make Calls with Amazon Alexa


Did you know you can use just about any Amazon Echo device to make phone calls for free? You can do the same in the Alexa app on iOS or Android, whether or not you have an Echo device. You can also call others in your contacts on their Echo devices instead of their phones. These services can be convenient, and they are real money savers for people paying per minute for their cell or landline phone. In today’s tech tip we’ll show you how to make calls with Amazon Alexa.

Step 1: Open the Alexa App on Your Phone

Making phone calls using Alexa is an opt-in service, meaning you’ll need to enable it and set it up before it will work. Open the Amazon Alexa app on your phone, and tap on the menu bars (likely in the upper left). Choose “Things to Try”. On that page, choose “Calling”. This area reveals several videos and explainers on how to get calling with Alexa set up.

Alternatively, you can simply ask your Echo device, “Alexa, how do I set up calling?” for verbal instructions. Those are nice, but you’ll end up needing to work in the app anyways. For that reason, we think it’s easiest to start in the app.

Step 2: Give Alexa Access to Your Contacts

In the Amazon Alexa app, open the Communicate tab by tapping on the Communicate button in the bottom row. If you’ve not done this before, the app will ask for access to your contacts. Tap OK to grant access.

If you want to use the Alexa app to make calls directly from your phone, you can do it from this screen. Simply select the contact you want to call, choose the right number (cell, work, or home), and the call should begin.

Step 3: Talk to Your Echo Device

If what you really want to do is make calls using your Echo device, you should be able to do so after following steps 1 and 2. You have to know the right lingo, however. You can start with a simple phrase like “Alexa, make a call.” Your Echo device will respond with a question of its own, asking who you want to talk to.

Some of your contacts can be reached multiple ways, so you’ll need to be specific with Alexa. Alexa should understand commands like “Call mom’s cell phone” or “call Shawna at work.” You can also call numbers not in your contacts list with “Alexa, call (555) 356-4321.”

To call another Echo device, simply say “Alexa, call Leslie’s Echo.” If Leslie has calling enabled on her echo, you’ll get patched right through.

If you want to explore phrases in more detail, look back at the “Things to Try” area in the app.

Note: Alexa Can’t Do Everything

One thing to note before diving into the world of phone calls with Alexa: Alexa and her associated devices do have some limitations. There are a few types of phone calls that Alexa can’t make. First, and most importantly, Alexa can’t call 911 or other emergency service numbers. These services need to know where you are, and even though you might think Alexa knows that, the functionality isn’t foolproof enough to support emergency calls.

Alexa also can’t (or won’t) call those pricey 1-900 numbers. (Yes, that’s still a thing.) Similarly, directory assistance and information lines of the 211, 411, or “star-88 on any cell phone” variety aren’t compatible with Alexa’s calling technology. For now, Alexa also won’t call internationally, nor will it respond to “call 1-800 CONTACTS” or other letter-to-number prompts.

Conclusion

Making phone calls through Amazon Alexa is a great way to save if you’re still counting minutes on your landline or cell phone plan. Follow the steps above to enable the feature and give it a try today.

Calling With Alexa

Categories
Blog Mailchimp

Start With Data Security

A huge component of IT security revolves around your data. Where it’s stored, how much of it you hold on to, where it’s gathered from, and how it’s protected are all things you need to think about when evaluating your IT security as a whole.

Check out this week’s Tech Tip for part one of our look at what goes into keeping your business IT secure.

If you have questions, give me a call at (469) 635-5500 or email me at datamagic@datamagicinc.com.

Regards,

Chase

Categories
Blog

How to Create a Strong Password You’ll Remember

Nearly every site or service we use online requires a username and password. Remembering hundreds of unique passwords is just about impossible, and reusing passwords across multiple sites can be dangerous. If one account is compromised in a data breach (and this is likely: check out IdentityForce’s list of all the breaches so far this year), any other account using that same password is now at risk.

Password Changes

Today’s username and password convention is a difficult system to manage well, but it remains important to create strong, unique passwords for your various accounts. We’re here to help today by sharing a few ways to create unique passwords that are strong and memorable.

Base Your Password on a Familiar Phrase

One way to make a password easier to remember is to base it on a phrase or term that’s familiar to you. Notice we didn’t say to use a term that’s familiar to you: “ilovesarah”, “sparky”, and “gocowboys” are all terrible passwords because they’re easy to guess. Anyone who knows that your wife’s name is Sarah, that your dog’s name is Sparky, or that you love the Cowboys might guess these easily.

Instead, come up with something creative, but that still has a connection to something you won’t forget. Something like “R3dsk1nsRool!” would be hard to guess since it runs counter to your actual interests, and it would be hard to crack due to the character variations. You’ll have an easier time remembering it, though, since it connects to one of your true passions.

Another variation on this theme is to take a poem or song lyric that’s meaningful to you and turn it into an acronym. “Row, row, row your boat gently down the stream” could turn into “RrrybGdtS”, for example. Easy to remember; hard to guess.

Use Long Passwords

Long passwords are hard to guess, but they’re even harder to crack using hacker tools. Use a memorable phrase in its entirety, or choose a series of seemingly unrelated words that mean something to you. You’ll create a password that’s easier to remember than the previous method and that’s even harder for a computer to crack. Check out this Xkcd comic, which illustrates this principle with an added dose of humor.

Use Two-Factor Authentication Wherever Possible

You should enable two-factor authentication (2FA) on any site that offers it. 2FA adds a second method of authenticating that you’re who you say you are. Most 2FA methods involve sending a numeric or alphanumeric code to the account owner (that’s you). This code can be sent via email, text message, or even be displayed on a physical key fob. The code is only good for a short window (usually 1, 2, or 5 minutes). After supplying your username and password, you’ll be asked for this code.

Most consumer applications of 2FA involve sending the code via text message. Unless a hacker has stolen or cloned your phone, he or she won’t be able to view this code and thus won’t be able to log in to your accounts—even with your username and password.

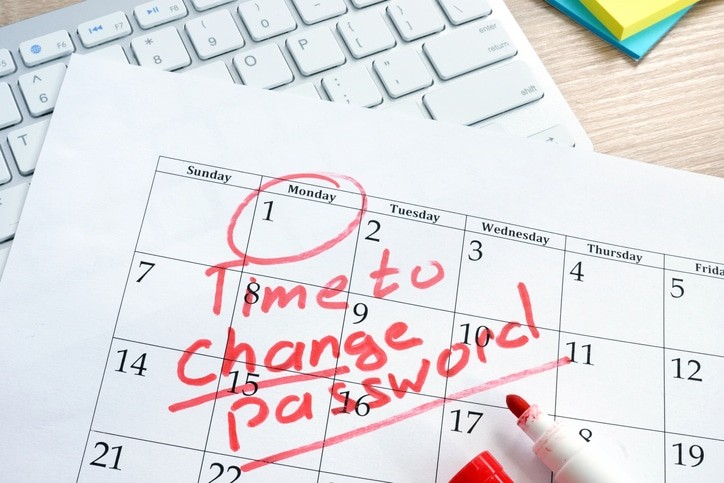
Change Your Password Frequently

Changing your password frequently is another way to stay ahead of information thieves. A stolen password is only useful until you change that password to something else. It’s good practice to change your passwords frequently, such as every 3 to 6 months. We realize that can be a lot of work. Changing only your most sensitive passwords (financial, social, and email) is better than changing none.

Use a Password Manager

All this sounds like a lot of work, and it is. Thankfully, there’s a better way. Using a password manager, you can create long, unique, complex passwords for each account — but you don’t have to worry about remembering them! All your passwords are stored in the password manager. All you need to remember is the strong master password you create for this utility.

Categories
Blog

How to Find Someone’s Email Address

Email Marketing

Email is a great system when it works well, but it has some frustrating limitations. You have to know someone’s email address to be able to reach them via email, and there’s no central database for finding email addresses. You can often use the internet to find people’s mailing addresses via directory searches, but not such parallel exists for email. If you need to get in touch with someone but don’t have their email address, here are a few tips for finding someone’s email address.

Within Your Organization

If you’re looking for someone within your organization, you can use Outlook to find the person. Simply create a new email, then click the button next to the “To:” field. This will bring up an address book search. Try searching last name first.

You can also use a keyboard shortcut: click in the “To:” field, then start typing the person’s last name. Press ctrl + K, and Outlook will narrow your list. Click the right one, and you’re done.

Outside Your Organization

It gets a little tougher outside your organization. Here are a few tips.

Google It

You can always try a good old-fashioned internet search. Search for the person’s name and the word “email”. Maybe include the person’s job title as well. For all examples below we’ll be searching for Frank Johnson, accountant at Awesome Accounting, Inc.

Get creative with your Googling. Other search ideas include searching [“Frank Johnson” “contact me” “Awesome Accounting”] or [“Frank Johnson” “Accountant”]. If you’re looking for a personal account, you could also search for [“Frank Johnson” AND “@gmail.com”]. Keep trying other popular email services.

Mine Social Media

Many people have an email address associated with their Facebook or LinkedIn accounts, and sometimes they make this public. Be sure to search social media for the person you’re trying to contact. Even if you can’t find an email address, you will likely find a way to contact the person. If it’s a personal contact, a Facebook message might be most appropriate. If it’s a business connection, stick to LinkedIn.

Check for a Website

Does the person you’re looking for have a website? If so, there is likely a “contact me” page there. These often route directly to an email inbox. You don’t get to see the address unless the person replies, but it’s a place to start. Some people also include an email address directly on their websites. This is less common, but it’s worth checking.

Use a Search Tool Like Pipl

There is no universal directory for email addresses, but services like Pipl are doing what they can. Pipl maintains a database of known contact information for many people, and it’s free to use. If your other methods don’t yield results, check here.

Skip to content